The Adobe Camera Raw and Lightroom Work Environments – Compared
Please NOTE: This is a pretty lengthy explanation and is best digested by those already familiar with the Camera Raw feature in Photoshop.
Lightroom's Develop module is built over the shell of Adobe's Camera Raw plugin (ACR), now an integral part of Photoshop. Camera Raw provides users of Photoshop the ability to nondestructively process (develop) raw image files, TIFF's and JPEG's in advance of opening them inside the application for pixel editing. There is no pixel editing going on inside of Lightroom. However, Lightroom is designed to allow for the seamless handing-off of images to Photoshop when pixel manipulation is required.
Lightroom is, if I can use the metaphor, a 'kitchen' inside which you create 'recipes' (sets of instructions) directing Lightroom how to display an image on screen, in a series as a web gallery or slideshow or set up an image or group of images in layout templates you can export to print. By importing images from a camera memory card or from a computer hard drive to its 'catalog' (its database) Lightroom allows one to index, label and organize the photographs it administers by way of handy markers built into its asset management workspace, the Library module.
Lightroom provides its users an elegant work environment to conduct its business in. Great care has been made to provide a sensible and intuitive layout of assets and the control features within each of its five modules. And there are features provided in the Develop module that Camera Raw does not have to work with: Most importantly are a History panel, Virtual Copies and the 'Lights On', 'Lights Dim' and 'Lights Off' features.
But if you prefer a spartan workspace to conduct your image processing in (and there are folks who do prefer that sort of work environment) then Camera Raw is your best bet. Tools are represented by tiny icons all situated in the topside toolbar and processing features are nested along the right below the combination Histogram/Info panel. Fortunately, as one rolls their mouse cursor over the icons, the tool or feature's name is generated momentarily by a tiny name tag reminding you what's there to work with.
However, this is a profoundly utilitarian work environment. After spending three years working daily in Lightroom, then spending just a bit of time with ACR to write this, I can't wait to get back to more comfortable digs! Lightroom's 'Lights Dim' overlay feature really helps one focus on the task at hand while working with the Crop tool in the Develop module! It dims both screens, if you are working with two monitors, everything but the image alone inside the central content window as one's center of attention. It would have been nice if by now Adobe had at least included the option of choosing from black, white or a darker value of gray as content window Backgrounds to select from in the Camera Raw environment. But the Background there is, as it always has been, '18% gray'.
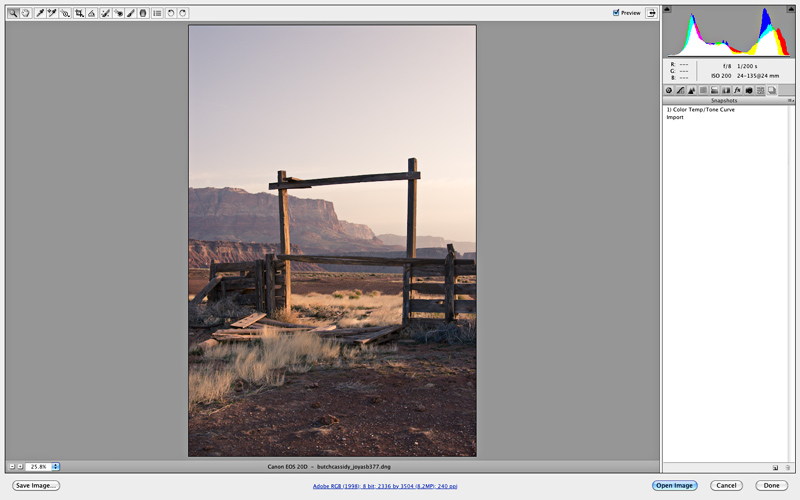
What you see is what you get to work with when Camera Raw opens – a stark, simple environment for processing images before passing the file on to Photoshop for additional, layered pixel editing. But consider the alternative...